Users with admin rights can use Bloxby to create and manage a front-end , public site for their Bloxby installation.
To do this, the admin user would create a new site, or use an existing one. The, inside the page builder, he would open the Site Settings panel (click the dropdown arrow in the top right corner, then click the link labeled “Site Settings”).
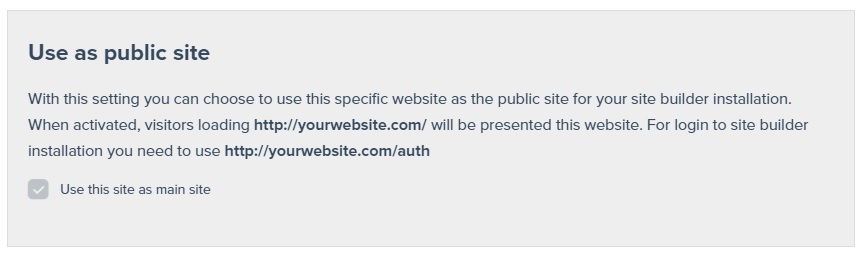
By checking the checkbox labeled “Use this site as main site” and saving the site settings, the selected site will now automatically load when visiting your copy of Bloxby in the browser.
The login path, “/auth” will remain active by default as the URL used to log into your application.
Linking pricing table buttons directly to the signup form
When creating a public page/site for your application you might provide potential customers with a pricing table displaying then different plans you’re offering. Typically, each of these plans would have a “signup” button, which would take the customer directly to the signup form. To implement this using Bloxby, you will need to open your public page or site in the page builder. Then, you will need to edit the button or link you’re looking to connect to your signup page. Next, under the “Link” tab in the style editor, you will need to need to enter the URL as shown in the image below:
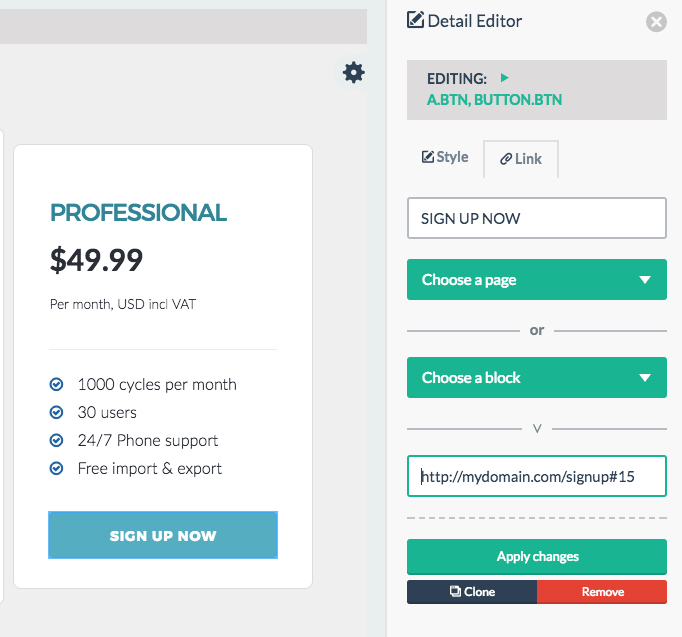
You would need to replace “http://mydomain.com” with the actual domain you’re hosting your application on. Furthermore, you will need make sure you’re using the correct ID for the plan you want to connect to this button to (this will make sure the correct plan is selected in the signup for automatically).
To locate the correct plan ID’s, make sure you’re logged in as an ADMIN user and navigate to the “Packages” section. In the table listing all the available packages, you’ll find a column labeled “ID” which lists the ID’s for all your plans.
Let’s assume you’re hosting your application on the domain “thebestbuilder.com” and you’re creating a link to the signup for the plan with ID “123”. The URL you’d enter for you link would as follows: “http://thebestbuilder.com/signup#123”.
Please note that “/signup” is a route alias for “/auth/register”. So instead of “/signup”, you can also use “/auth/register”.
Leave A Comment?
You must be logged in to post a comment.